
Terrain brush
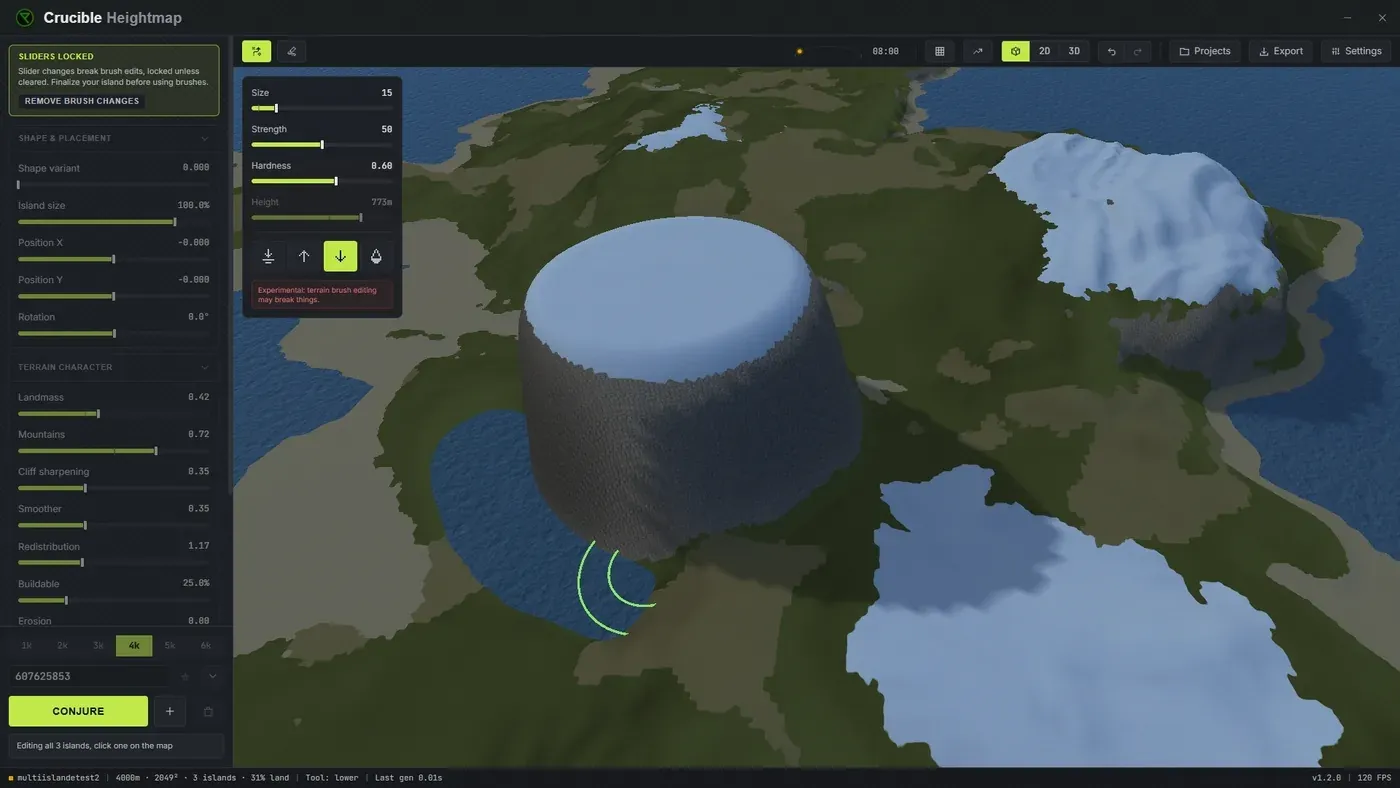
The terrain brush lets you hand-edit and sculpt terrain after generating it, giving you fine control over specific features. Tweak the coastline, carve out valleys or river channels, flatten building spots, and refine elevation before exporting. Toggle it with the Brush button in the toolbar or press B. A small panel appears with brush controls, and live preview updates as you paint so you see terrain changes in real time.
Your sculpting goes into the exported map. Every .map, RAW and PNG you export carries the terrain exactly as you left it, brush edits and all, so what you shaped is what opens in RustEdit.
The generation sliders lock once you lay your first stroke, not when you switch the brush on. Hand edits and the generator cannot both own the terrain, so the moment you sculpt, the sliders that would rebuild the map from scratch grey out. Turning the brush off does not bring them back. Conjure is never locked.
There are two ways out, and one of them keeps your work:
- Bake painted terrain in the terrain brush dock folds your strokes into the islands themselves. The sliders unlock, the island can be moved and rotated again, and your sculpting stays. On a map with several islands the button reads Select all painted islands first, so click it once to gather every island you have painted on, then again to bake them.
- Remove brush changes, in the Sliders locked banner, throws your sculpting away and hands the map back to the sliders.
Baking is the one to reach for unless you actually want the sculpting gone.
What brush types are there?
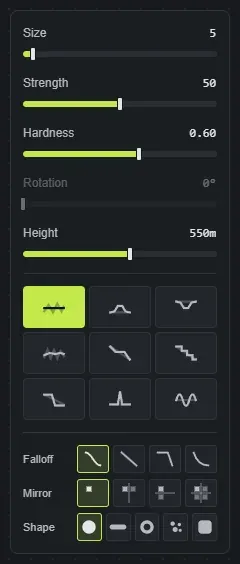
Section titled “What brush types are there?”- Flatten: levels terrain toward a set height. Use it to carve a flat building spot, create a plateau, or prepare a specific area for monuments. Ctrl + right-click on terrain to sample the height you want to flatten toward.
- Raise: pushes terrain up. Good for adding a hill, reinforcing a ridge, or lifting a low area to add more buildable ground.
- Lower: pushes terrain down. Use it to deepen a valley, cut a river channel, or create a sunken area for water features.
- Smooth: softens and blends terrain, evening out rough spots. Apply it after other brushes to blend transitions, or use it to calm noisy terrain if the generation is too chaotic.
- Bench: levels a shelf at the height you first click, so a hillside gets a flat step without you having to sample a height first. The quickest way to cut a building platform into a slope.
- Terrace: cuts flat steps a set distance apart, for stepped hillsides and rice-paddy terrain. The Step slider sets the height between steps.
- Bluff: steepens a slope into a face, for sea cliffs and headlands. Hold Alt to soften the same slope back down.
- Pucker: pulls a sharp peak up. Hold Alt to dig a pit instead.
- Ripple: lays concentric rings, with the Wavelength slider setting how far apart they sit. Hold Alt to invert them.
Hold Alt to run any brush backwards. Raise lowers, Bluff softens, Pucker digs, Ripple inverts. It saves swapping brushes to undo a stroke you nearly liked.
What do the brush controls do?
Section titled “What do the brush controls do?”- Size (1 to 80, default 5): the brush radius in pixels. Small (1-15) for detail work like carving small channels, medium (20-40) for general terrain tweaks, large (50-80) for broad sweeping changes.
- Strength (0 to 100, default 50): how strongly each stroke affects the terrain. Low (10-30) for subtle blending, medium (40-60) for normal adjustments, high (70-100) for aggressive terrain changes. Start low and build up in layers for better control.
- Hardness (0 to 1, default 0.6): how sharp the brush edge is. Lower (0-0.3) gives a soft, feathered edge good for smooth blending, higher (0.7-1) gives a harder edge for precise cuts and defined features.
- Height (0 to 1000 m, default 550): used only by Flatten, the target height it levels terrain toward. With Flatten selected, Ctrl + right-click on the terrain to sample a height into this value, then paint to flatten at that exact elevation.
Shaping the brush itself
Section titled “Shaping the brush itself”- Falloff picks how strength drops from the centre to the edge: Smooth (the default rounded dome), Linear (an even cone), Sharp (a narrow spike, for detail) and Soft (near full strength until it drops away at the very edge, which gives a flat-topped mesa).
- Shape swaps the round footprint for a stamp: Ridge, Crater, Speckle or Chisel. Drop your own black-and-white images into the
brushesfolder next to the app and they appear in the list too, so you can sculpt with any silhouette you like. - Rotation (0 to 360 degrees) turns the stamp, so a ridge or a chisel can run along the slope you are working on instead of always facing the same way. It only applies to a stamp, and it works the same in the 3D preview and the in-game view. O and P turn it from the keyboard.
- Mirror repeats every stroke across the middle of the map, on one axis or all four quadrants, for symmetrical arenas and event maps. Its keybind action is called Cycle symmetry.
- Ctrl and the scroll wheel resizes the brush, in the 3D view and the in-game view both.
- Falloff, stamp shape and symmetry each have a cycle action in Settings, Keybinds. They ship unbound, so give them a key if you swap between them often.
- The slope overlay comes on by itself while the terrain brush is open, so you can see what is too steep to build on while you sculpt.
- Hold Space while brushing to move the camera, then release to keep painting.
- Brush strokes are undoable with Ctrl + Z.
- The generation sliders lock as soon as you lay a stroke. Bake painted terrain unlocks them and keeps your sculpting; Remove brush changes unlocks them by throwing it away. Conjure keeps working either way.
- Read the worldgen page before you sculpt a finished map: worldgen is derived from the terrain, so heavy brush work after generating means generating again.