
Install Crucible Local Server
Crucible Local Server is a free Windows app delivered through the Crucible launcher, the hub for the Crucible apps. You install and update it from there, and once it is open the app installs the Rust dedicated server files for you, so there is no SteamCMD setup to do by hand.
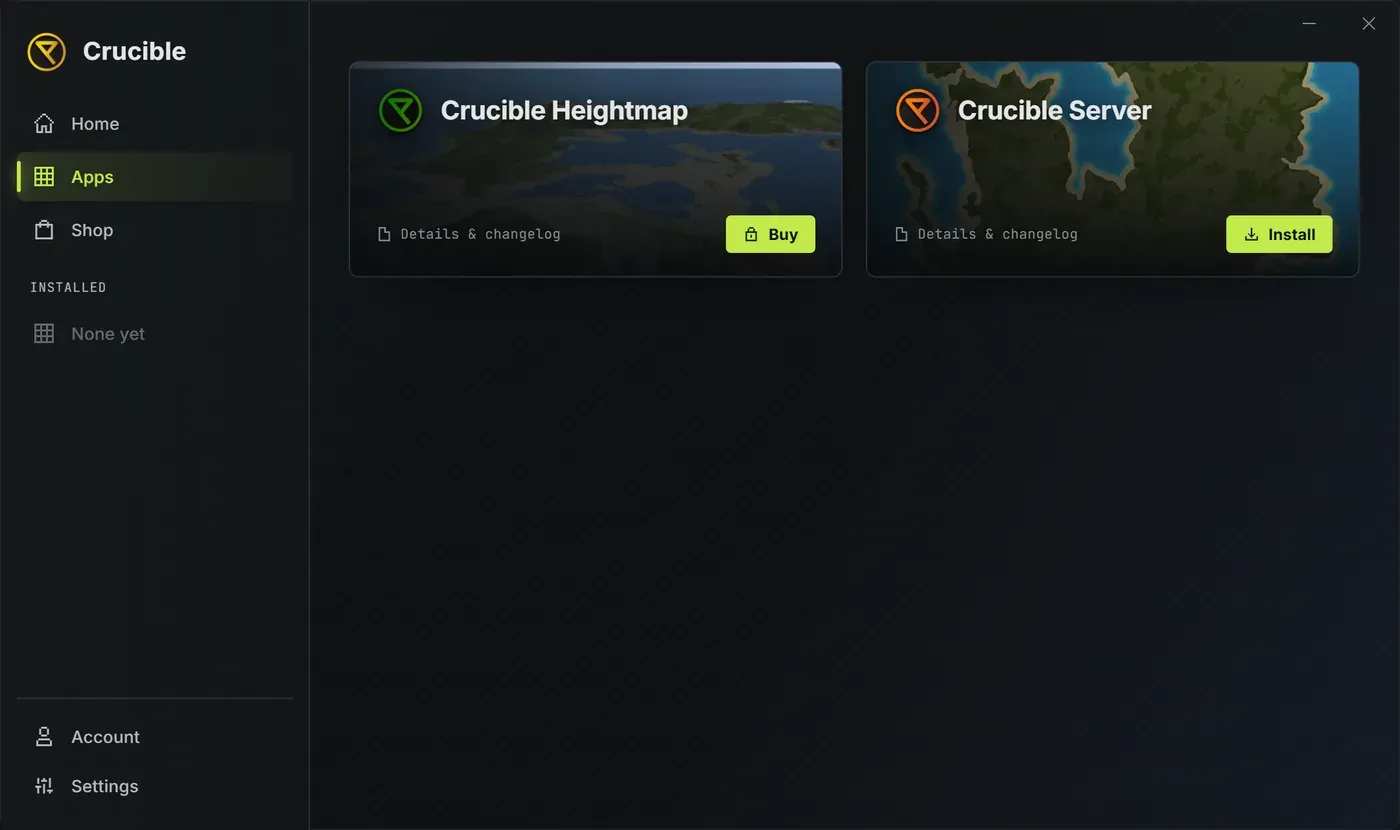
Get the app from the launcher
Section titled “Get the app from the launcher”Crucible Local Server is an app inside the launcher, not a separate download:
- Install and open the Crucible launcher on your Windows PC.
- Find Crucible Local Server in the Apps view and press Install. The launcher downloads it and adds it to your library.
- Open it from the launcher.
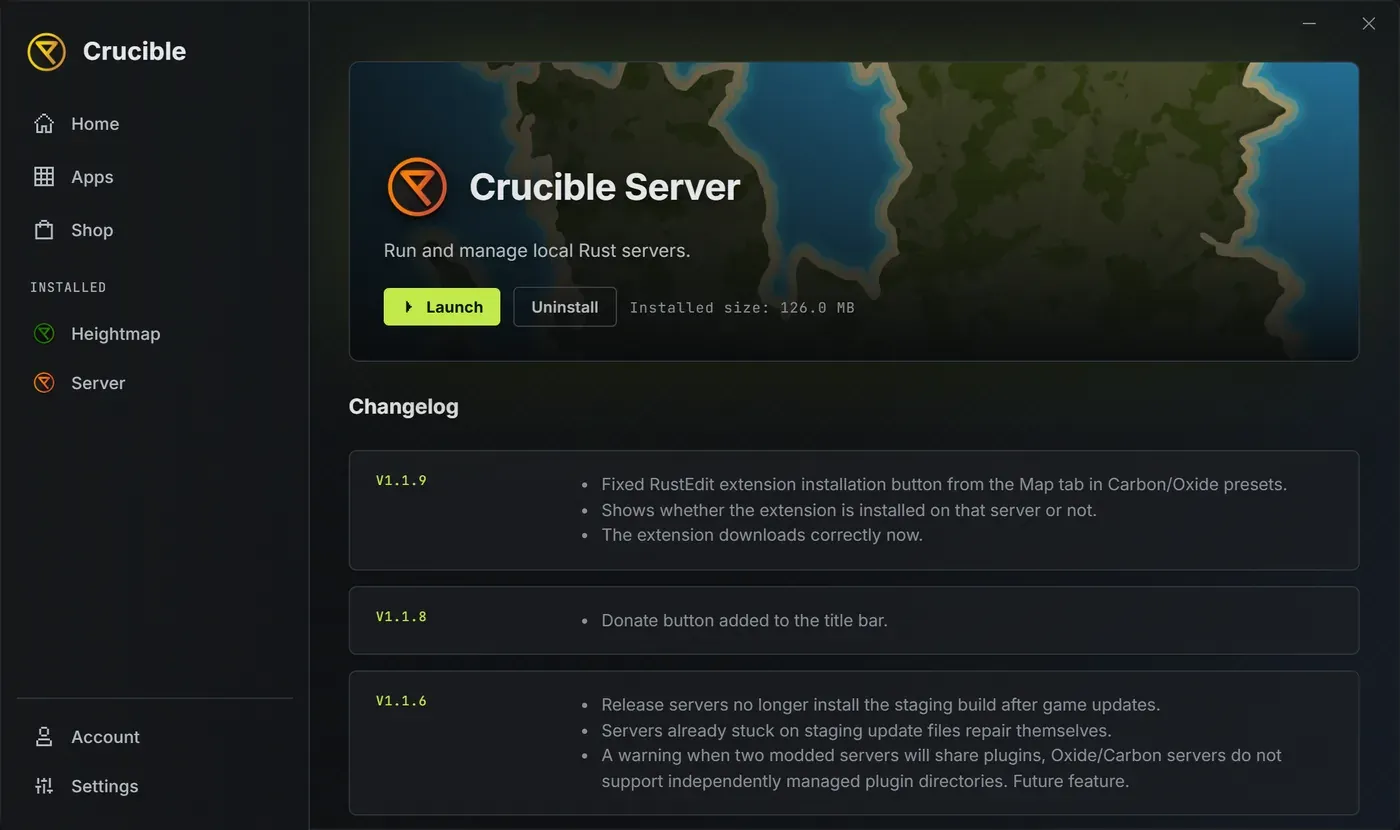
The launcher keeps the app current, so a new version installs in place with no re-download. Its detail page shows the app’s status, version, and Install, Update or Uninstall controls.
First run
Section titled “First run”Crucible Local Server opens straight to the server list, with no startup prompts. From here you install the Rust dedicated server files (below), then create your first server.
Install the Rust dedicated server files
Section titled “Install the Rust dedicated server files”Before a server can start, the app needs the Rust dedicated server on disk. It handles that through SteamCMD, inside the app:
- Open the Installs dropdown from the button in the titlebar.
- The app bootstraps SteamCMD and downloads the Rust dedicated server, showing a live progress bar. Each installed row then reads back its size on disk, and a row you have not installed reads Not installed.
- Installs are organized by branch and mod stack. The default is release on the vanilla stack, with staging and the aux dev branches available if you need to test against them.
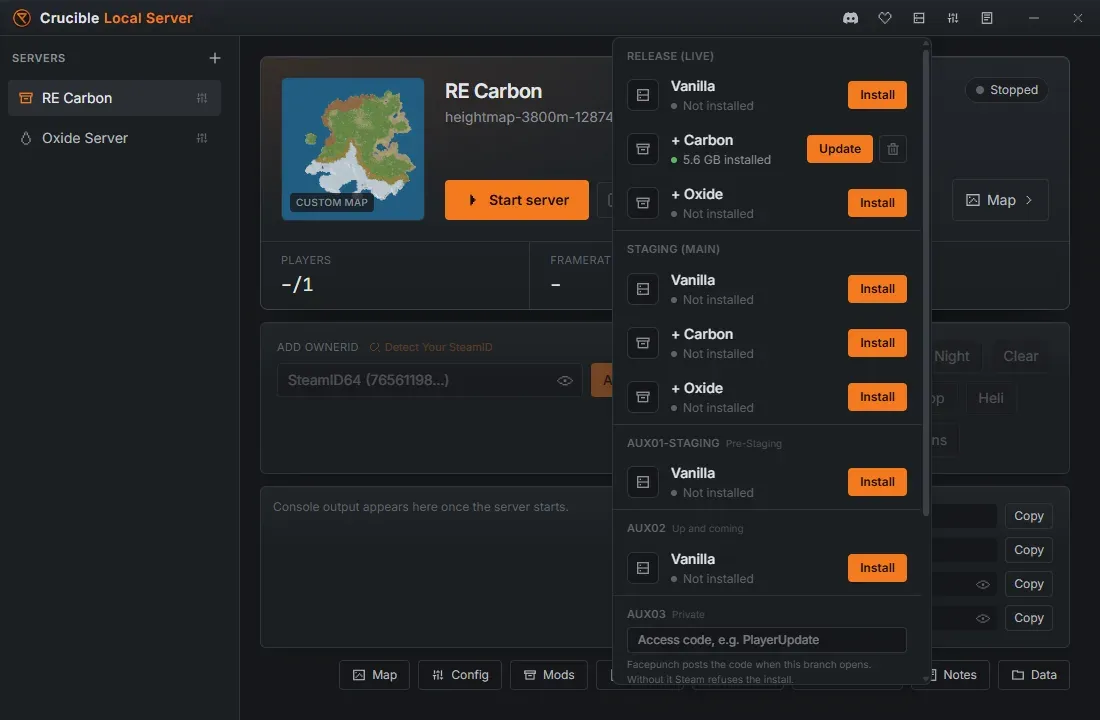
Most branches install with one click. The exceptions are aux03 and aux04, which are private betas: Facepunch posts an access code when one opens, and Steam refuses the install without it, so those two rows carry a code field. The other aux branches, aux01-staging and aux02, are public and need no code. To play on a staging server, you switch your own Rust client to the matching branch too, see run and join a Rust staging server.
Each install is its own copy on disk. Vanilla servers on a branch share one clean install, while Carbon and Oxide each get an isolated install of that branch, so a modloader never contaminates a vanilla server. Carbon and Oxide are offered on the release and staging branches; the aux dev branches are vanilla only.
Servers stay up to date on their own
Section titled “Servers stay up to date on their own”You never have to remember to patch. Update server files on start is on by default: when you start a server, the app checks the branch’s latest build and, if the install is behind, downloads the update with the same progress bar before the world boots. You can turn it off in Settings. Routine updates are quick because the app only downloads what changed; a full file verify runs on a first install.
A scheduled restart can install the update too, while the server is down.
Next step
Section titled “Next step”With the Rust server files in place, create your first Rust server from a preset and start it.
If the install stalls, will not finish, or the app cannot find your files afterward, see troubleshooting.